Rhea made gifts for sisters and sister's-in-law. She suggested I make something for the five brother's-in-law. After a few days thought I decided to make Randolph Bulgin's trapped nut puzzles. (see Randolph Bulgin: Puzzles and Peculiarities from the Machine Shop)They will be accompanied by a note that reads something like: "This is a test to see if you still remember how to get your nut off." Hopefully, they will find the quote and the puzzle amusing.
I first made a test sample to determine the best way to make multiple copies. I found 36" of 1/2" steel hex. Two pieces were cut off: a 1 1/2" and a 2" piece. The 1 1/2" piece was faced on both ends. One end was chamfered and one end was center drilled. The center drilled end was then reduced to 3/8" for 1 1/8" leaving a 3/8" wide nut. This same end was drilled 5/8" deep with a #25 drill and tapped 10-24. 10-24 was chosen because Randolph points out that if the nut is to obscure the join the external and internal threads must have the same pitch. The external threads will be cut 3/8-24.
The 2" piece was treated the same as the 1 1/2" length. The difference is that it carries along for the ride the nut. This nut was cut off after threading this second part. This is not the correct time to remove the nut. If it is also center drilled it will support the bolt during thread cutting. Since it was cut off, it was drilled up to "O" and tapped 3/8-24. Both sides were chamfered. The new end was faced and center drilled. A < 3/4" length of 10-24 threaded rod was cut from a SHCS. It was glued into one of the bolt halves. The picture below shows the four parts at this stage.
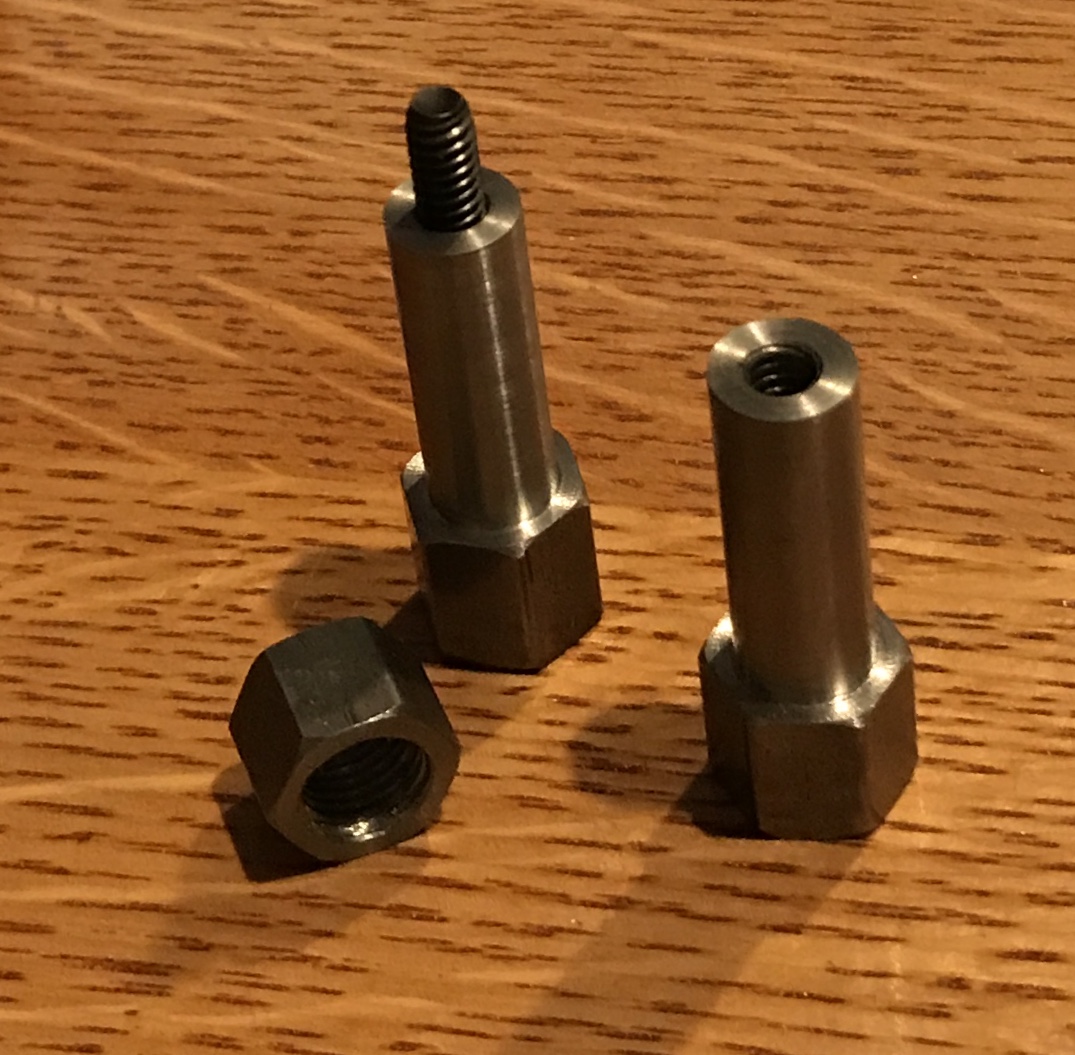
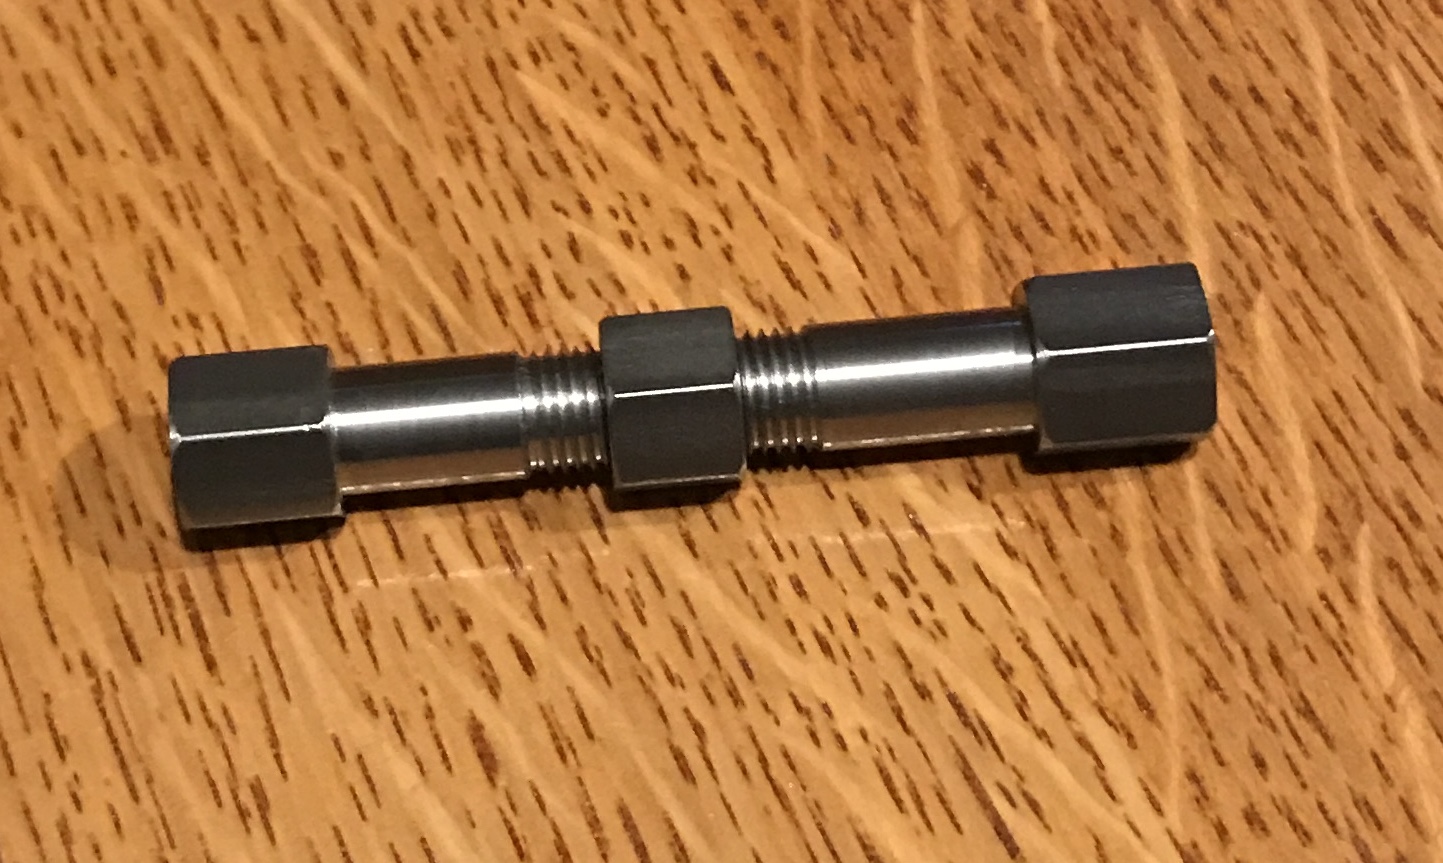
After the glue dried the two halves of the nut were screwed together. Before cutting the threads a small rod of 1/2" brass was reduced to 3/8". Threads were cut on this to get the correct depth. Theoretical is 0.0315, but a depth of 0.025 was sufficient for an easy fit of the nut from above. So the assembled halves were put in the chuck. The far end was center drilled. With a tailstock center in place a finishing cut was made across the halves. The join was no longer visible. Threads were cut for a about 3/4" centered on the join. The threads were cut to 0.025" deep. A small file was used clean up the end of the threads. 320 grit sand paper cleaned up the hex faces. A picture below shows the assembled puzzle.
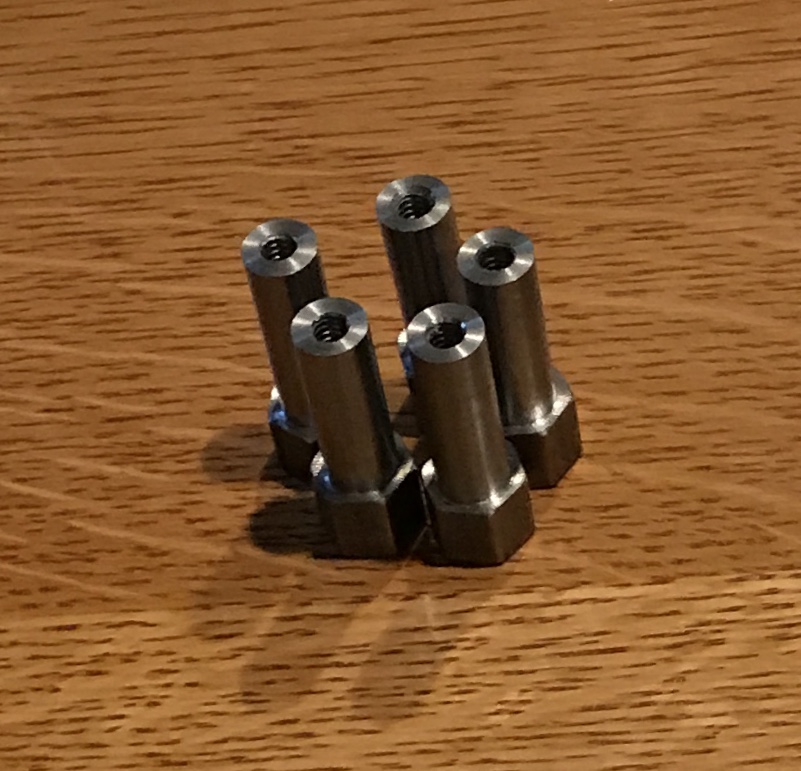
This morning the production run was begun. Five 1 1/2" lengths of 1/2" hex steel were cut off with a hacksaw. One end was faced and chamfered. The other end was faced and 1" was reduced to 0.380". It was center drilled, drilled with a #25 drill and tapped 10-24. Tapping was finished in the vise. This sequence of actions was repeated on the remaining four parts. The complete set of five is shown below.
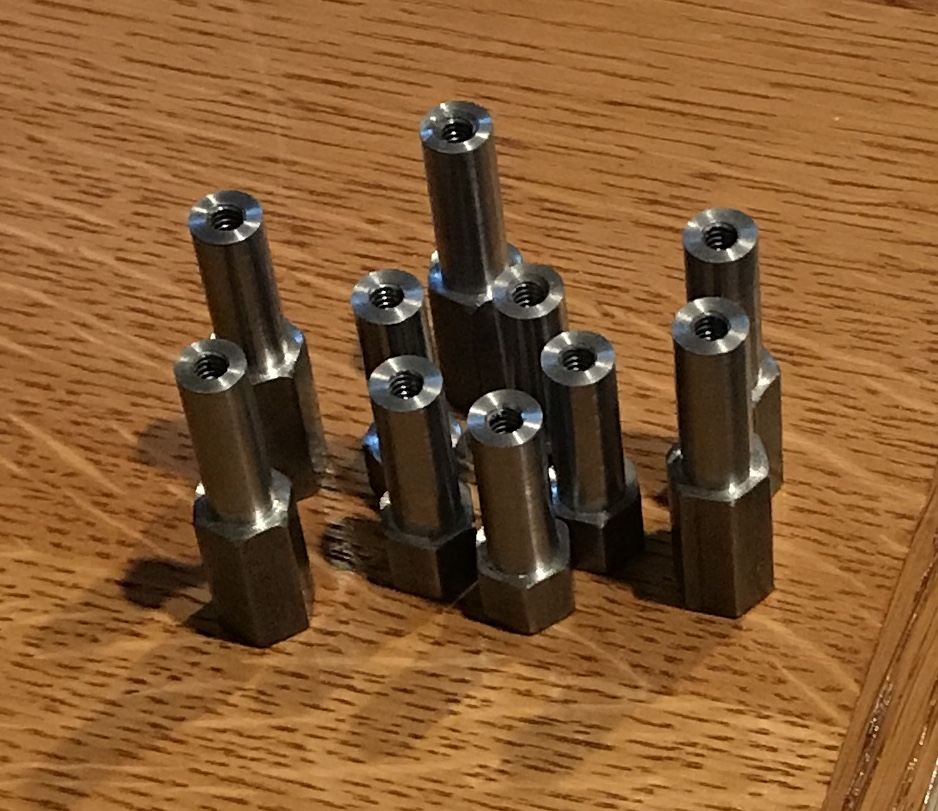
Five 2" long pieces of the same steel hex were cut off. All of the steps above were repeated on these parts as well with one additional step. When the first side was faced it was also center drilled. This end will go in the tailstock when threading and will eventually be cut off to form the nut. All ten parts at this stage are seen in the photo below.
Five 10-24 screws were cut off with a hacksaw at 3/4" to make the requisite studs. These must have been hardened screws as the hacksaw was very dull by the fifth stud. The studs were cleaned up with a nut and file as needed. A small amount of Loctite was applied to each stud and it was screwed into the longer halves 3/8" deep. These were left to dry.
The halves were paired up to get close to similar diameters. (Varied from 0.377" to 0.382") A pair was tightened and placed in the lathe between chuck and tailstock center. A section, 3/8" from either side of center was reduced to 0.375" approximately. The center section was sanded to 1500 grit. This was repeated for the four other pairs. The lathe was switched to threading. A 24 tpi thread was cut across the reduced section. After doing all five the nuts were cut off of the long end. The hacksawed long end was faced and chamfered. The nut was then faced to length (7/16") and chamfered. The pilot hole was drilled through up to 'O' and tapped 3/8-24. The tap was started on the lathe and finished in the vise. Both ends of the hole were chamfered. The picture below shows all five puzzles at this stage.

Started polishing this morning. The sample piece was done first without its nut. In one piece it was sanded with 120, 220, 320, 600, 1000, and 1500 grit sandpaper. The 2000 grit paper left a duller finish than the 1500?!? The steel wheel was on the buffer. It was charged with the blue compound. It took a while before I got the hang of it. For the actual presents I changed things a bit. The puzzles with nuts on were sanded on all six faces up to 320 grit. The puzzles were then taken apart and each part sanded up to 1500. I couldn't seem to get complete contact with the high grits when the puzzles were assembled. Each end was polished with a fresh charge of compound. It was polished along the axis of the screw and then held horizontally in both directions. The nut was polished when screwed onto the part without the central stud. It was only polished in two directions to avoid it unscrewing. Three puzzles were completed in four hours.
Completed the last two after lunch. It was four o'clock after some cleanup. I also coated the polished puzzles with Johnson's paste wax. The next morning I engraved the names of the five brothers-in-law, Dave, Robert, Mack, David and Kent on the trapped nut as seen in the final photo.

The following is a little note that will be included with the puzzle.
This is a little test to make sure you are not losing it as you age. Are you still able to get your nut off ?